I’ve been meaning to make a lattice notice board for ages, so now that I have time (thank you, summer holidays) and motivation, I thought I would go for it. Here is the finished item.
I must say, without a shred of modesty, that I am very pleased with how it turned out.
If you’d like to make one, you will need:
- A large empty photo frame. A cork board or similar would also do nicely. You don’t need the glass. Mine was 50x70cm.
- Wadding/batting. I used 2oz/1/4inch thick stuff that I bought on eBay. It needs to be about 15cm larger than your frame, so I used about 65x85cm.
- Fabric. Go crazy here. Needs to be about 25cm larger than your frame, so I used 75x100cm.
- Ribbons in complementary colours. I used about 10m of ribbon in total.
- Upholstery nails. These are also knows as furniture nails or tacks. I got these from eBay as well and used about 30.
- Straight pins
- Strong glue or a staple gun
As a note, though using an old picture frame worked very well, getting the furniture nails through the back board without proper tools was extremely difficult. It was also a bit difficult to get the backboard back into the frame once it had all the wadding etc on it. I would recommend cutting out a piece of reinforced cardboard, craftboard, corkboard or similar to avoid this difficulty, though it is not insurmountable. Making the board 5mm smaller than the original backboard would also help.
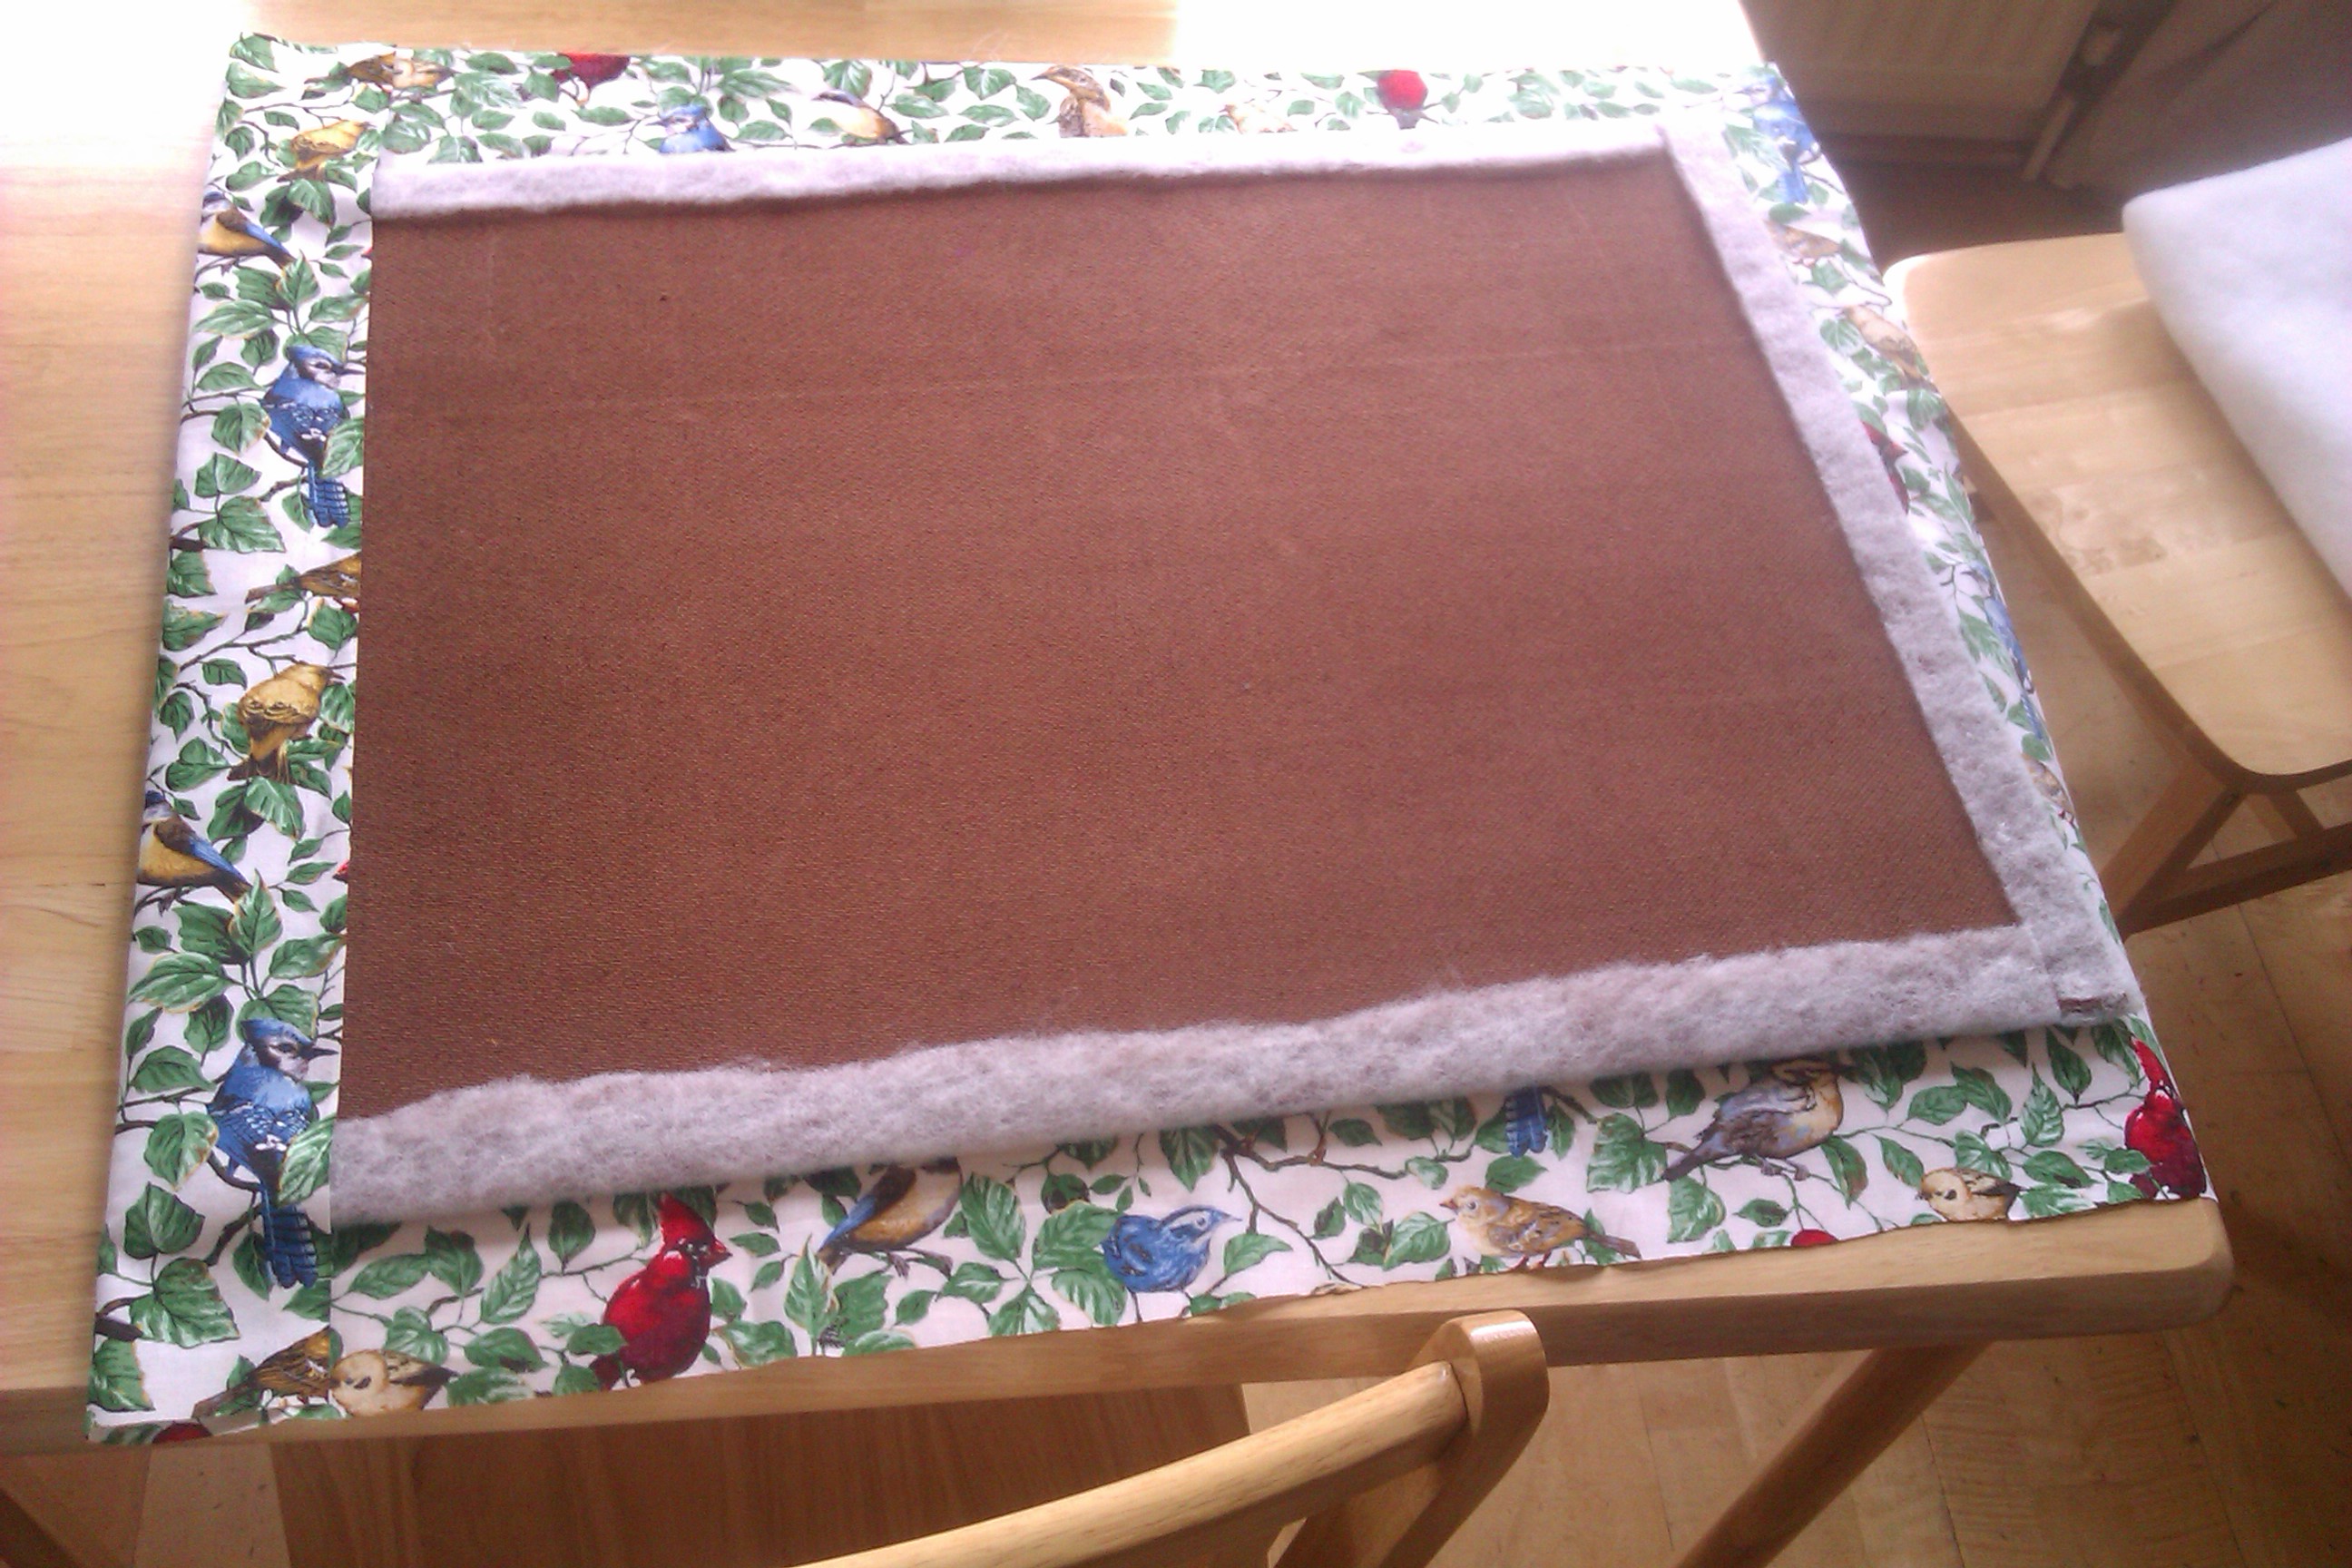
Step 1: The batting
Cut your batting to the correct size so there is a 4cm-ish border around your board. Then glue or staple the overlap to the back of the board like so.
 Step 2: Jeremy Irons
Pretty self-explanatory!

Step 3: The fabric
Cut your fabric to the correct size- so there is a 7cm-ish border around your board and then glue or staple it down.
 Step 4: The ribbon
Flip the board. Begin placing your ribbon in a pattern you like. I took ages doing this, and measuring helped to make sure they were even. Once you have them placed as you wish, pin them down with straight pins. This will be important later! You can also do some basic weaving to make the lattice look even cooler and help keep the ribbons in place.
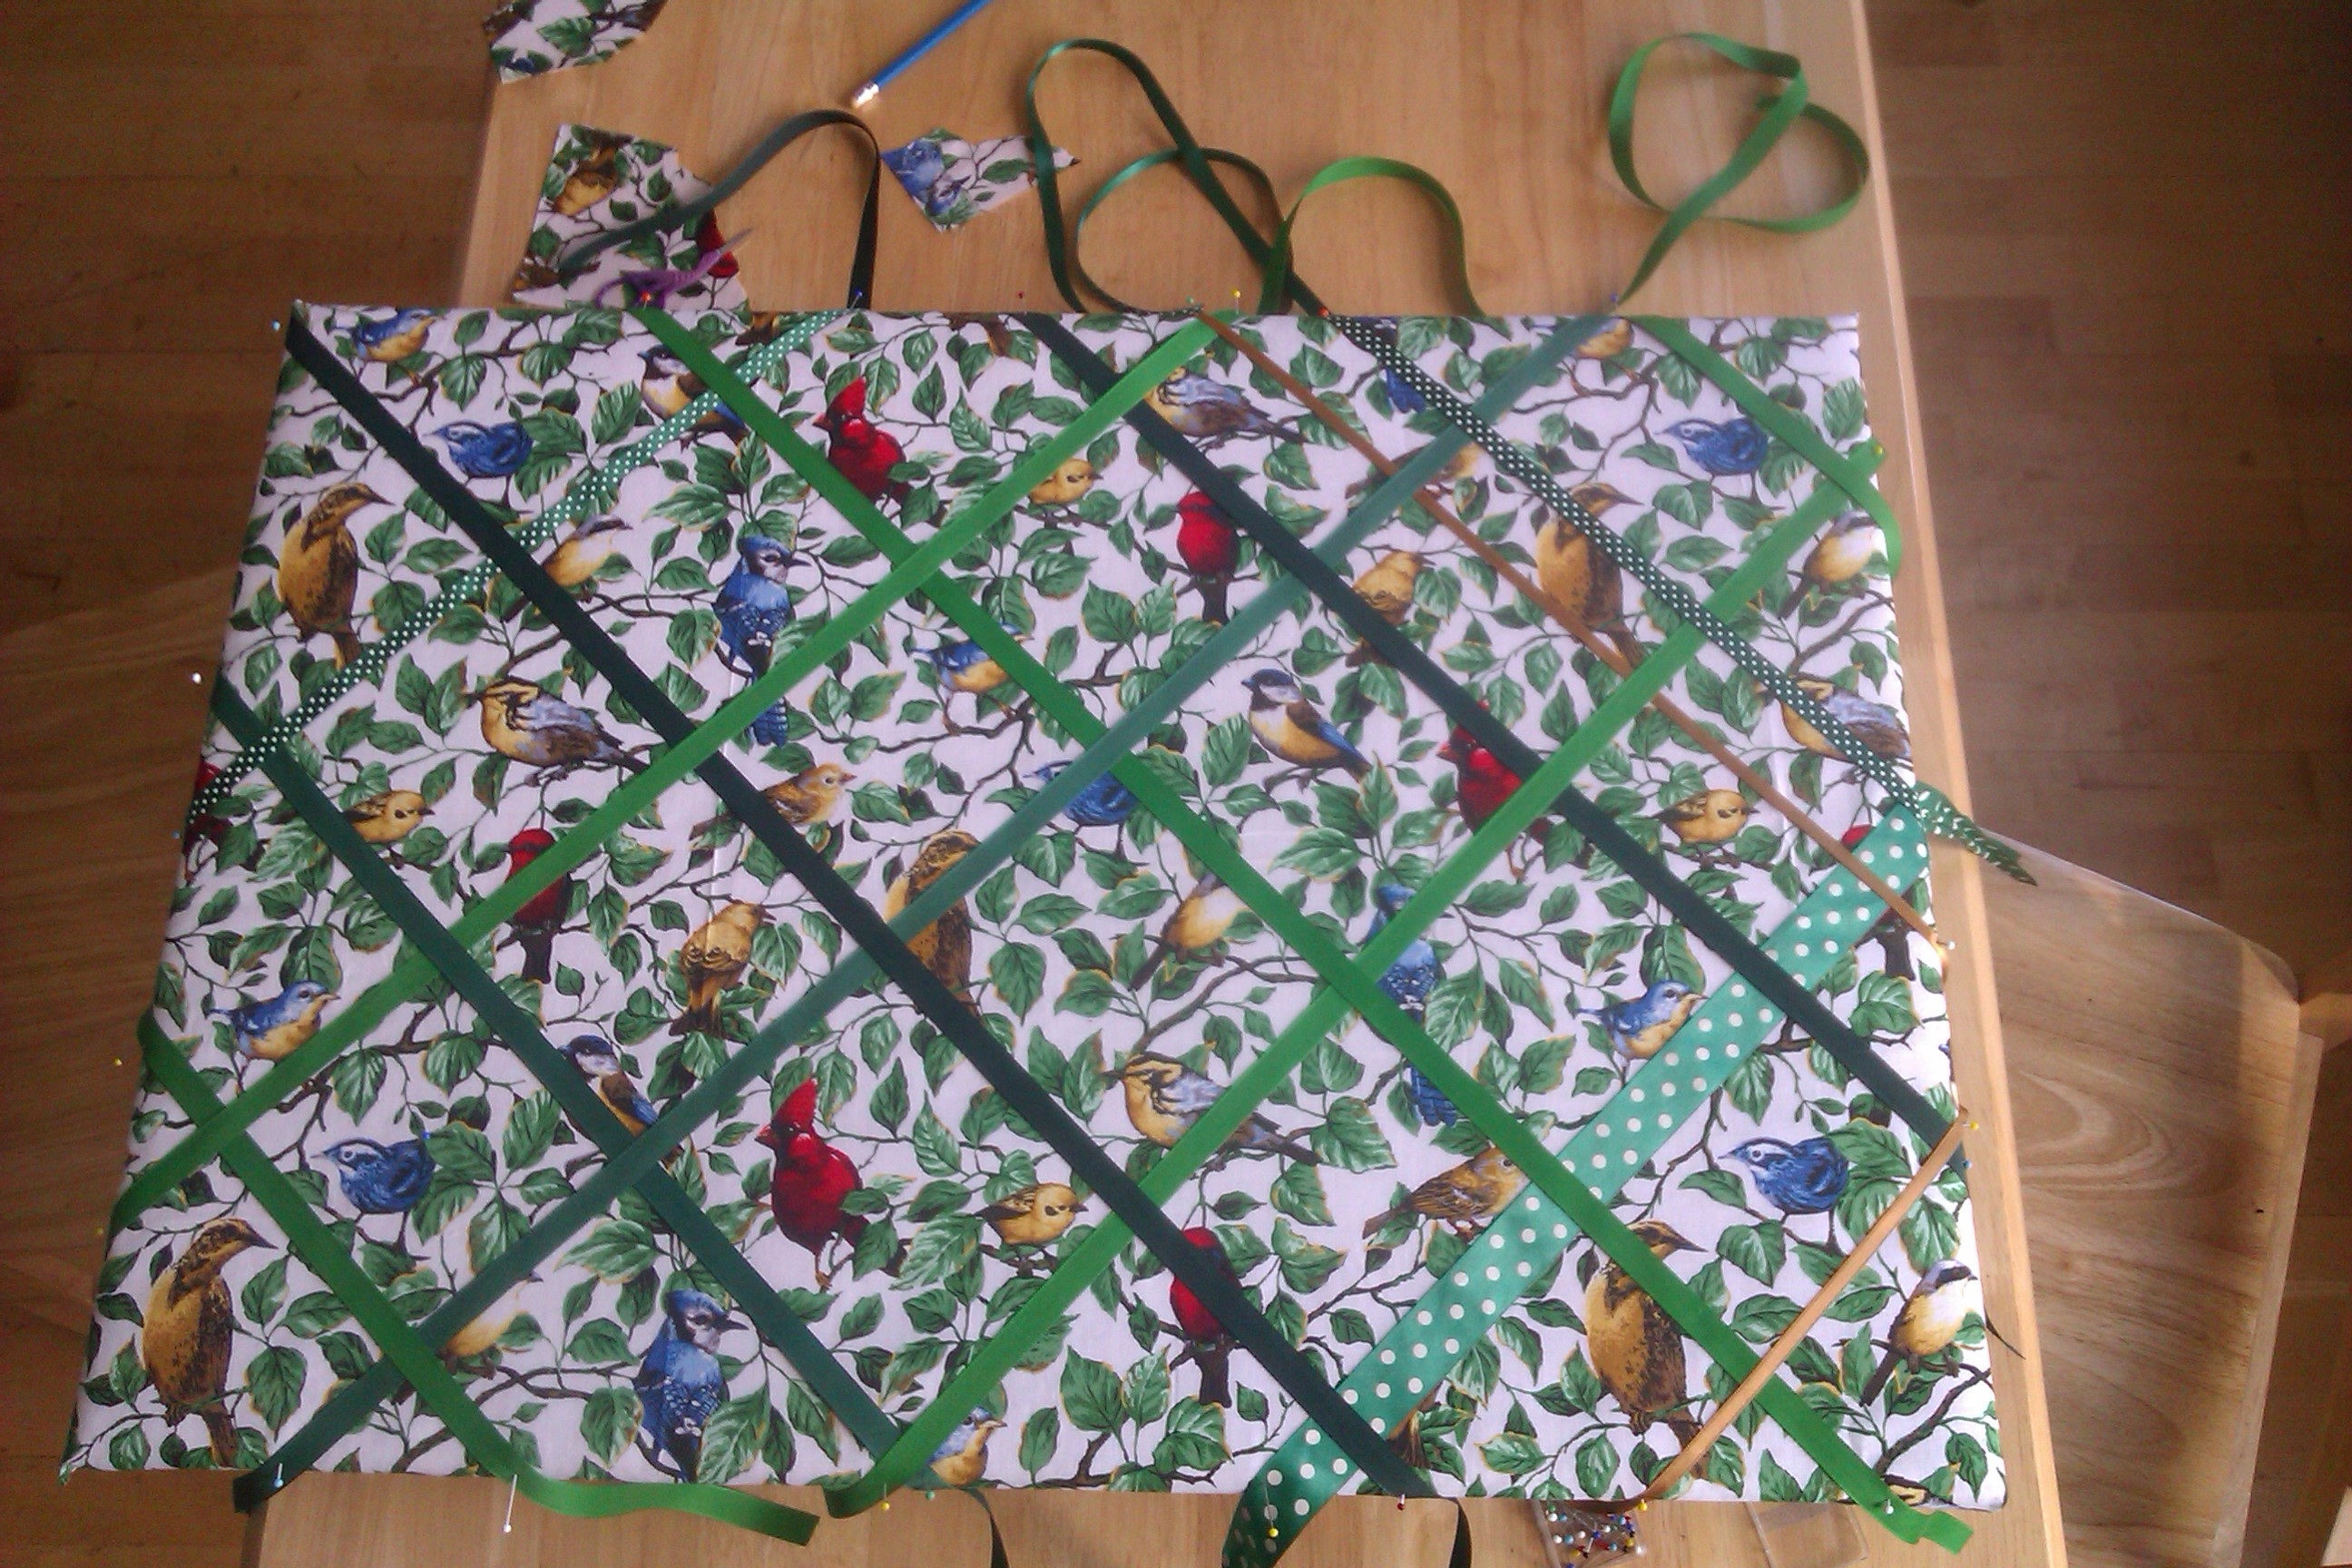 Don’t stress about the ribbons too much as it’s not too late to add more later if you wish.
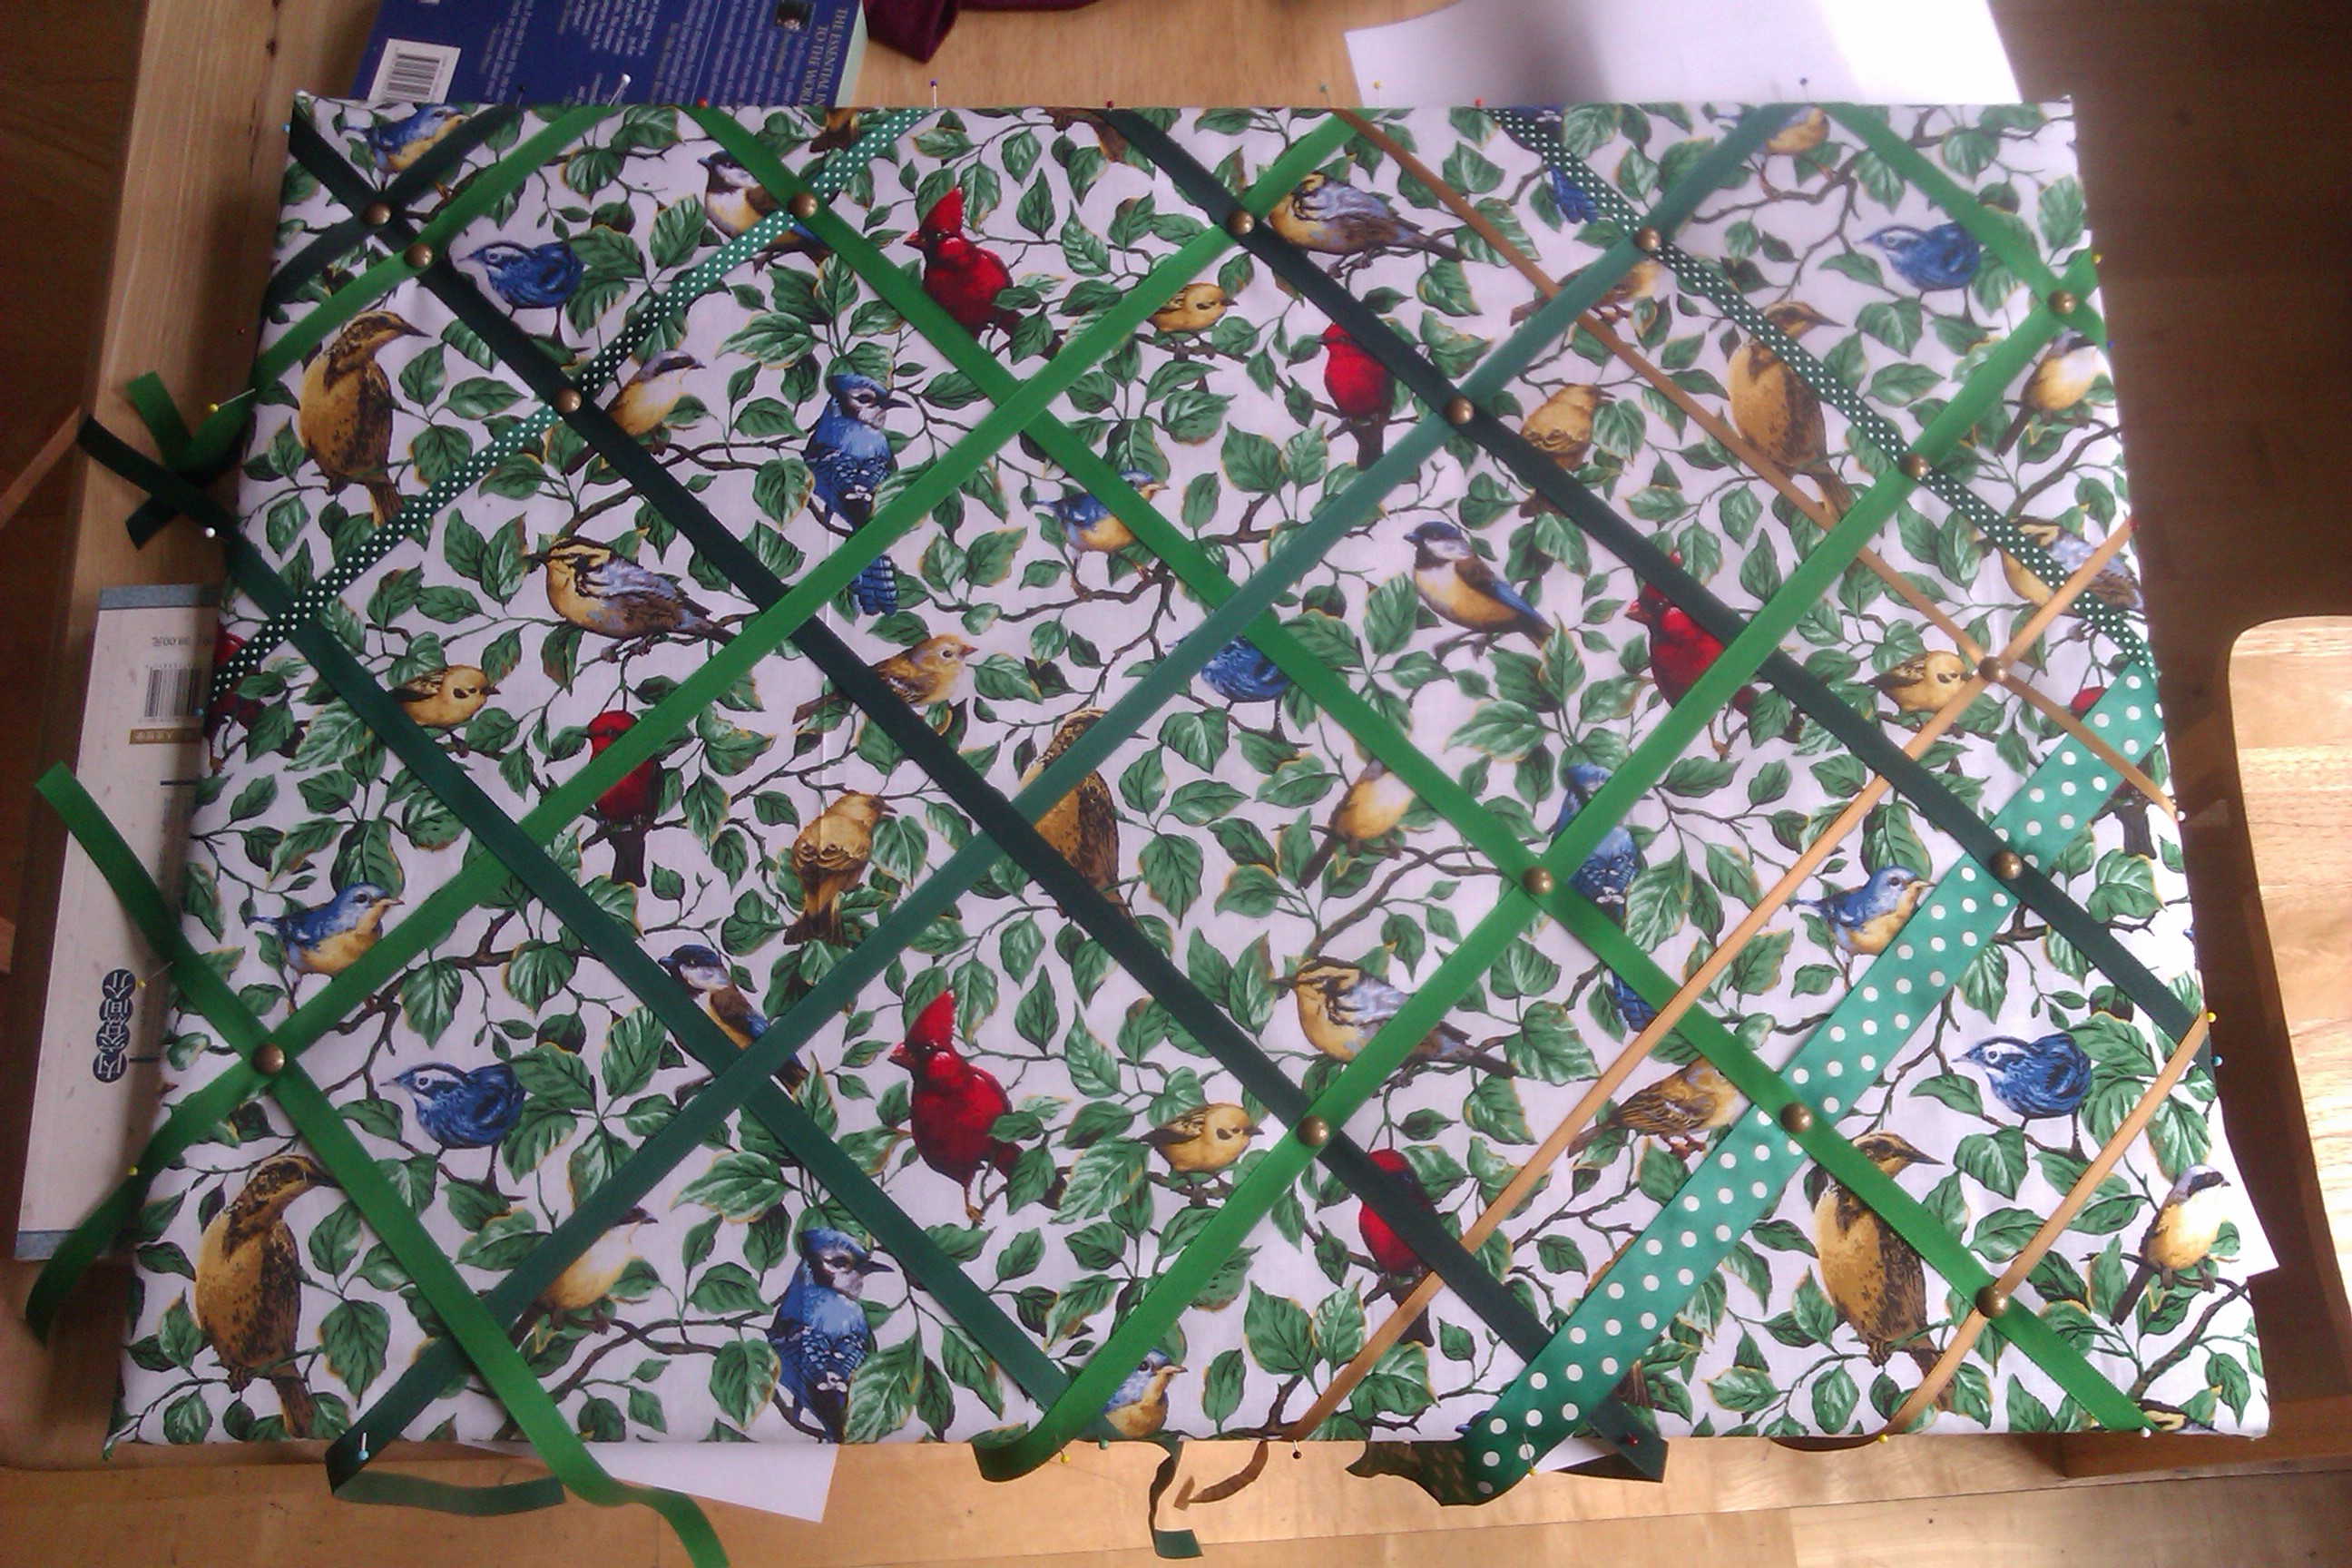
Step 5: Things get tacky
Once you’re happy, you can begin pushing tacks through the intersections of the ribbons. Place carefully… …then push through
 The pictures make it look easy, but as I said at the beginning, beware of doing this with a wooden backboard. I took a picture of my hands afterwards and it ain’t pretty!
Anyway, this is how it starts to look. Don’t remove your straight pins yet!
 Step 6: Tie up the loose ends
Once you’ve finished with the tacks, flip the board again. If the pointy bits are sticking through the back, you might want to cover them up to make it more user-friendly. I cut up small pieces of cork, but you could use plasticene or something similar.
Now, secure the ends of the pieces of ribbon however you wish- I used a combination of glue, pins and tape. Those suckers won’t be moving any time soon! Pull the ribbon gently and make sure you follow it around the board so that it lies nice and flat.
Step 7: You’ve been framed!
Shove… I mean carefully place the board back in to the frame, step back and admire your handiwork , you crafty thing!

meandjd
This looks awesome! I love it!
LikeLike
Maddy
Beautiful! Mine is muchly inferior – don’t use foam board people! Tacks and staples don’t stick in it too well. Take this advice and use a photo frame
LikeLike