Unsurprisingly, given how ubiquitous halloween has become here in the UK, last week’s OddBox contained a pumpkin.

I think this is my first experience of having a whole pumpkin in the house. I’ve carved one before but I normally substitute butternut squash or pumpkin in recipes.
I decided to try a new pancake recipe that Anna tagged me in on Instagram.

The batter is fantastically smooth and these are much more like traditional pancakes than the egg and banana ones I normally have. I wasn’t crazy about the flavour but I steamed enough pumpkin to try again. I’ll try adding more cinnamon and using more exciting toppings. Maybe a berry compote and some soured cream.

I actually hate pumpkin spice lattes so maybe I’m just not a fan of that flavour combination.
I was also invited to a Halloween party and in a bit of a quandary about what to do about wearing a costume. I’m generally quite lazy when it comes to fancy dress. I’ve never been able to see the point of buying things to wear only once so my costumes have tended be assembled from things I already own or can re-use. For example, a few years ago I dressed as Super Mario.
I can’t believe I used to post such terrible images on my blog! I bought the dungarees and top secondhand (on eBay, but still). The top and hat entered my regular wardrobe, the box was used to package a gift and I upcycled the dungarees into my Cateralls.
I have a pink wig, a shameful leftover from the year I dressed as Nicki Minaj and I had to buy a second wig because I’d accidentally ordered the first from China). I was quite keen to wear that but didn’t have much to go with it. I looked around a couple of local charity shops for inspiration and found this Wonder Woman costume for £6. It was a no-brainer.

After looking at some images of WW online, I was very tempted to buy a headband to finish the costume off. I’m pretty sure the costume had a horrible wig with it- thankfully the charity shop employee didn’t realise. It was much more fun and empowering to be a brown Wonder Woman with my own hair out.

Anyway, after nearly purchasing an official Marvel headband on Amazon I decided instead to get a metre of gold ribbon and make my own.
It’s funny to realise how I still feel drawn to buy things in order to make experiences ‘more fun’ or legitimate. Luckily I hadn’t had the idea sooner or I would have probably bought an expensive handmade head piece on Etsy and justified it by saying I’d ‘saved money’ on the costume so it’s okay to splurge on the accessories. Capitalism is so deeply engrained and pernicious.
In the end I was thrilled with my costume and thoroughly enjoyed wearing it. I’m so grateful to the person who donated this perfectly good item to be loved again rather than going to landfill.
Weekly tilt
A disadvantage of trying to reduce waste is becoming hyper-aware of how wasteful society is. Here I share things that have bothered or worried me.
I still haven’t found a way to compost my food waste. I’ve started saving some veg scraps in the freezer to make stock but this only works for a small proportion of vegetables. I’m researching community composting but it’s quite slow going. I’ve tried emailing some local parks with greenhouses. I’m on the verge of wild composting (aka collecting the scraps and dumping them in a park).
I just saw a video about Germans being legally obliged to compost and I really wish that our government would start taking the health of the planet more seriously. Instead, my taxes are wasted on Brexit nonsense. I’m at the point where I would pay to have my food waste composted but no one seems to be offering this service in London.
I seem to be slightly obsessed with baked cream cheese lately. Which is understandable, because it’s bloody delicious. I’ve been looking for a recipe to use up 3/4 cup of pumpkin puree that’s been hanging around in my freezer, and this pumpkin cheesecake with gingersnap crust really fit the bill.
I’m not actually the world’s biggest fan of cheesecake. I think that’s because most British cheesecakes aren’t baked, and I think it’s the baking that transforms the cream cheese into the silky, luxurious texture you get in an American-style cheesecake. I also think that digestives are the most boring biscuit on earth, so any recipe that uses something else for the base gets points from me.
I got quite a few cracks in the top of my cheesecake, as you can see in the pics. I wonder if baking it in a water bath would reduce this problem.
Ingredients- for the base
- 230g (2cups) ginger nuts, finely crushed
- 40g (1/4 cup) pecans, finely chopped
- 60g (1/4 cup) butter, melted
For the topping
- 3/4 cup pumpkin purée- you can use around 1/4 cup less if this is all you have
- 1tbsp plain flour
- 1/2 tsp cinnamon
- 1/4tsp ground nutmeg
- 1/4tsp ground cloves
- 680g (24oz) full-fat cream cheese
- 3/4 to 1 cup sugar, depending on taste
- 1 1/2 tsp vanilla extract
- 3 eggs
Method
Bake until fragrant and a little firm, about 12 to 15 minutes.
Meanwhile, in a medium bowl stir together pumpkin, flour and dry spices until combined. Set aside.
In a separate bowl, using mixer or by hand, beat cream cheese until smooth. Add sugar and vanilla, beating until smooth. Add eggs one at a time, beating after each addition until combined.
Stir about a cup of the cream cheese mixture into the pumpkin mixture and stir until smooth.
Pour the remaining cream cheese mixture over your crust.
Place spoonfuls of pumpkin mixture randomly over the cream cheese.
Using a knife, gently swirl the two together to achieve a marbled finish

Bake for 25-30mins, until centre is just set.

Cool completely in the pan on a wire rack.
Cover and refrigerate for 4-24 hours before lifting the cheesecake out of pan and cutting. Store in the fridge until serving.
This week I managed to squeeze in some kitchen time. I rediscovered my love of Nigella’s teriyaki chicken recipe, learnt of wonders of panko, and also made these tasty cookies. I don’t think I’ve had a snickerdoodle before. These are light and cakey in texture, and the cream cheese surprise in the middle makes them really special.

Ingredients
- 1 cup/225g butter
- 1 cup/225g sugar
- 1/2cup/80g light brown sugar
- 3/4 cup/200g pumpkin purée
- 1 large egg
- 2tsp vanilla
- 3 3/4 cup/540g plain flour
- 1 1/2tsp baking powder
- 1/2tsp salt (halve this if using salted butter)
- 1/2tsp ground cinnamon
- 1/4tsp freshly grated nutmeg
For the filling
- 7oz/200g cream cheese
- 50g sugar
- 2tsp vanilla
And just because there’s not quite enough sugar
- 1/2 cup/100g granulated sugar (you won’t use all of it)
- 1tsp cinnamon
- 1/2tsp ground ginger
- I also added a little black pepper
Method
1. Beat the butter and sugars until light, around 2-3mins
2. Blend in pumpkin and egg, then add vanilla
3. Mix together the dry ingredients, then add to the wet. Mix by hand until just combined. The dough will be very wet.
4. Cover and refrigerate for an hour.
5. Mix together the cream cheese, sugar and vanilla for the filling and leave to chill for an hour.
6. Preheat oven to 350F/180C and line baking sheet(s) with baking parchment.
7. Combine sugar and spices in a small bowl and set aside
8. To form the cookies, take a tablespoon of batter and flatten it.
Place a teaspoon of filling in the centre

Make a second pancake of batter and place on top.

Tightly pinch the edges to seal in the cream cheese.
Roll into a ball

Coat in the cinnamon sugar.

I actually found it easier to make the second pancake first and set it aside while messing with the filling.
Place on the baking sheet 2 inches apart. Flatten slightly before baking.
Bake for 10-15mins, until tops have cracked.
This is how many cookies I got.
They didn’t last long.
Last weekend I stared death in the face as I squared up to one of my greatest fears. Well, to be more accurate, I stared snails in the face because I gardened and I am terrified of creepy crawlies. Basically, I don’t like anything that isn’t cute and furry, or brightly coloured.
I may have squealed rather a lot when a snail reared its tiny head at me, presumably gnashing its teeth in an attempt to intimidate me, but then it started moving very slowly in the opposite direction, so it was fine. I’m not sure when I developed my horror of minibeasts, though I do remember being repulsed when, at the age of about seven, I jumped off a swing and crushed a snail with my knee. It was nasty.
Anyway, one of the benefits of my recent move has been gaining a garden. It’s a typical London garden, i.e. tiny, neglected and mostly concrete, but a garden it remains. For the past few years I’ve had vague fantasies of living like The Good Life, as a self-sufficient woman rearing shit and growing other shit. Well, the journey of a thousand miles begins with a single step, and mine was the impulse purchase of a child’s pumpkin growing kit in Morrisons.
The first step was easy. I planted the pumpkin seeds in the tiny pot provided and left it to sweat. I was really pleased that some shoots came up, as I have a history of planticide.
Soon, my seedlings were too big for the confines of the tub, so I got some compost and managed to repot them without casualty.
I started getting them used to being outside. I begn buying and borrowing gardening equipment. All the while, avoiding what was to come.

The jungle. What terrors would I find lurking in the undergrowth?
Spoiler: It was mostly woodlice.
I yanked at stuff , snapped twigs and raked at the earth with a tool borrowed from my mother, and an hour or so later, I had achieved this.
I’m pretty sure that at least one plant is already dead, but I planted it anyway in case it’s a Jesus pumpkin plant.
The wild plants in the rest of the bed are covered in aphids, so my next task is to make some spray to get rid of them. But I have a pumpkin patch of my very own!
These pumpkin cupcakes turned out to be a great way to use up the pumpkin I had left over from my previous Halloween baking exploits. The pumpkin makes the cupcakes nice and moist with a hint of spice, and the cream cheese frosting adds a great tang (as well as a second hit of sugar). Again, I think they would be much improved by a few nuts.
I don’t have any great pictures of these. Because the frosting was a bit loose, I decorated them at work, where there is no natural light.

Ingredients
Makes 12 cupcakes
- 1 1/2 cups plain flour
- 1tsp baking powder
- 1/4tsp bicarbonate of soda
- 1/4 tsp salt
- 1tsp ground cinnamon
- 1/4tsp ground nutmeg
- 1/4tsp ground ginger
- 2/3cup granulated sugar
- 1/2 cup packed light brown sugar
- 1/2 cup light olive oil or butter
- 2 large egs
- 3/4 cup pumpkin puree
- 1tsp vanilla extract
- 1/2 cup chopped nuts such as pecans (optional)
For the frosting
- 8oz cream cheese, at room temperature
- 1/2 cup butter, at room temperature
- 2 3/4 cups icing sugar (I used muscavado icing sugar)
- 1/2 tsp vanilla extract
This will leave you with some leftover frosting. I made my frosting with about 3/4 of the ingredients stated but it came out a bit loose and I’m not sure why.
Method
1. Preheat oven to 180C/350F
2. In a large bowl, cream both types of sugar and your butter or oil, until well combined.
3. Add the eggs one at a time, beating in between
4. Add pumpkin and vanilla
5. Slowly sift in the dry ingredients (including spices), continuing to mix between additions.

6. Check out the autumnal beauty.
7. Divide the batter into a lined 12 hole muffin tin
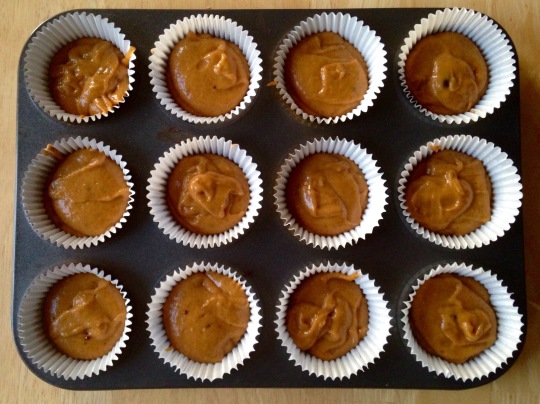
8. Bake in your preheated oven for 16-24 minutes, until a cake passes the toothpick test.

9. Transfer to a wire rack to cool. Meanwhile, make your frosting. Cream together the butter and cream cheese until smooth. I used an electric hand mixer.
10. Mix in the vanilla and then the icing sugar until thick and smooth. If the frosting is a bit slack, chill in the fridge while your cupcakes cool.
11. Once the cupcakes are cool, pipe or spoon on your frosting. Combine them any way you like, I don’t judge.
I’m getting quite into my autumnal baking, so I decided to try this bread flavoured with the increasingly popular spiced pumpkin. As I learnt, plain pumpkin doesn’t have much of a flavour but it does give this bread a lovely colour, and add moisture. As it’s an American recipe (upcoming stereotype warning), it’s incredibly sweet. I’ve dialled down the sweetness in the recipe below, but you can find the original here. The result is very similar to a cinnamon roll, with an added kick from the glaze if you use it. If I make this again, and I definitely will if I see pumpkin on sale, I would add some pecans because nuts make everything better. Everything.
- 2 tbsp butter
- 1/2 cup milk
- 2tsp (1 sachet) instant yeast
- 3/4 cup (half a tin) pumpkin puree*
- 1/4 cup sugar (granulated is fine)
- 1/2 tsp salt
- 2 1/2 cups strong white flour
For the spiced sugar
- 3/4 cup sugar
- 2 tsp ground cinnamon
- 1/2 tsp ground nutmeg
- 2 tbsp butter
For the glaze
- 2 tbsp butter
- 1/8 cup brown sugar
- 1 1/2 tbsp milk
- 3/4 cup icing sugar
- 1 tbsp rum (replace with more milk if you want to make this non-alcoholic)
*Yes, I used tinned pumpkin. There was no way I was going to mess around with a pumpkin myself, and I had some left over to make another autumnal recipe. It does look funny, though.
Method
1. Brown 2tbsp butter in a small saucepan over a medium heat. Browned butter seems to be very fashionable in America at the moment. You allow the butter to melt and turn frothy…

…then watch carefully as the milk solids become golden brown. Don’t take your eyes off the pan at this stage as the butter can very quickly blacken and burn. This is what you want it to look like
2. Remove pan from heat and gently add milk. Return to the hob and heat through.
3. Allow to cool until just warm. Add the yeast and 1/4 cup of sugar, and leave to stand for 5 minutes.
4. Add the pumpkin, salt and 1 cup flour. Stir until combined.
5. Add the remaining flour 1/2 cup at a time until you have a slightly sticky dough.
6. Turn out onto a floured surface and knead for about 6 minutes, until the dough is smooth and elastic. It will still be a little sticky, try not to add too much flour.
7. Transfer the ball of dough to a lightly oiled bowl. I put mine back in the saucepan to save on washing up.

8. Leave to rise for 60-90mins, until doubled in size.

9. While the dough is rising, make the cinnamon sugar that will flavour the bread and create the tearability of the loaf.
Brown another 2tbsp butter. Add the sugar, cinnamon and nutmeg and mix well, making sure the sugar absorbs the butter evenly.

10. Grease your 9×5 loaf tin and set aside.
11. Once the dough has risen, return to a lightly floured surface and roll out to a rectangle that is 20x12ins.

12. Sprinkle evenly with the cinnamon sugar. Take some time over it, pressing the sugar into the surface of the dough evenly.
VvasXs

13. Slice the dough vertically (as pictured) into six even strips. Try to make each strip just slightly narrower than the width of your loaf tin.
14. Stack the strips on top of each other.
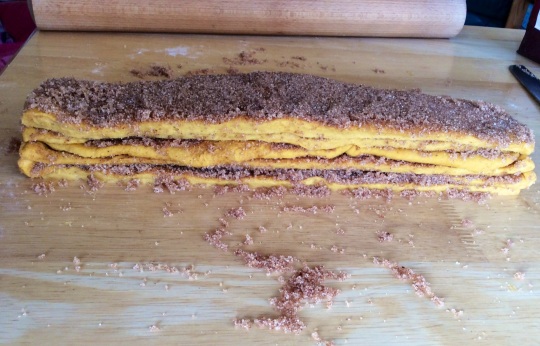
15. Cut into six even squares and stack into the loaf tin vertically. You may need to squish them down so they all fit.

16. Cover and leave to rest for 30-45mins.
17. Preheat your oven to 180C/350F.
18. Bake your risen loaf for 30-40mins. The top will be a deep golden brown. Leave to cool in the tin for a few minutes, before removing to a wire rack.
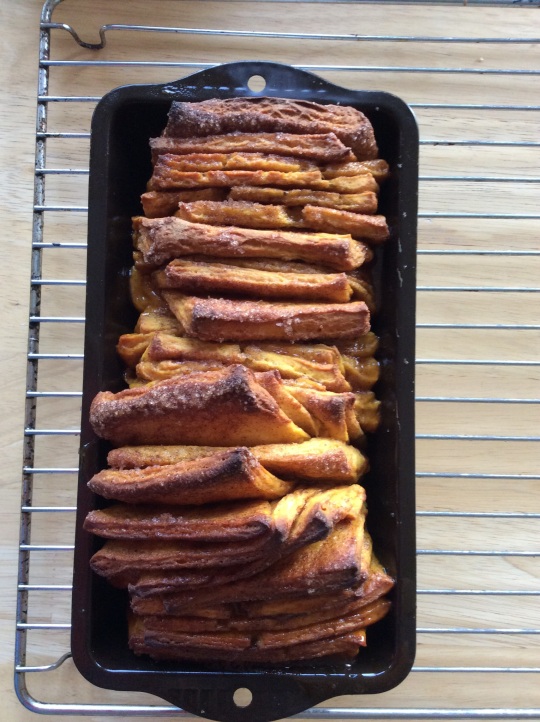
19. Prepare the glaze. Heat the butter, milk and brown sugar in a small saucepan. As soon as it comes to the boil, remove from the hob and stir in the rum and icing sugar. Pour over the loaf while it’s still warm.
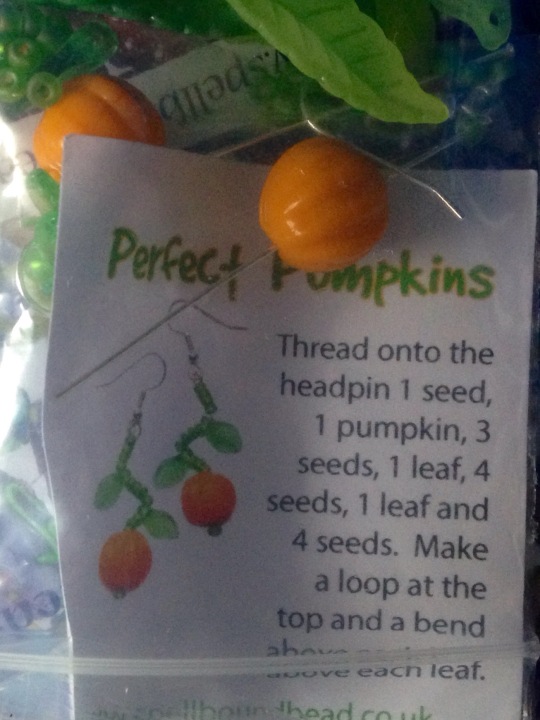
Another of my Knitting and Stitching Show purchases was a kit to make a pair of pumpkin earrings for Halloween. I decided to dig out my old jewellery making stuff and turn them into jack-o-lantern earrings.

Here’s a blurry pic of the kit. I like my dangly earrings to have plenty of movement and not be too stiff, so I knew I would have to make some changes to the suggested design.
If you want to make your own incredibly snazzy halloween earrings, you will need:
You will also need small jewellery pliers
This is a really cheap project. I bought my kit for £1 and you should be able to pick up the materials for this amount or less.
‘Carve’ your pumpkins
You can simply draw faces on with black marker or nail varnish and a tiny brush.
If you fancy more of a challenge, use yellow and orange varnish to give the design a shining light effect. Starting with the yellow, roughly fill in the areas you want to look cut out.

If you have orange too, blend it in with the yellow. I used a crisp packet as a palette to help me. I also looked at reference images on Google to help me get an idea of how the light shines through pumpkin carvings.
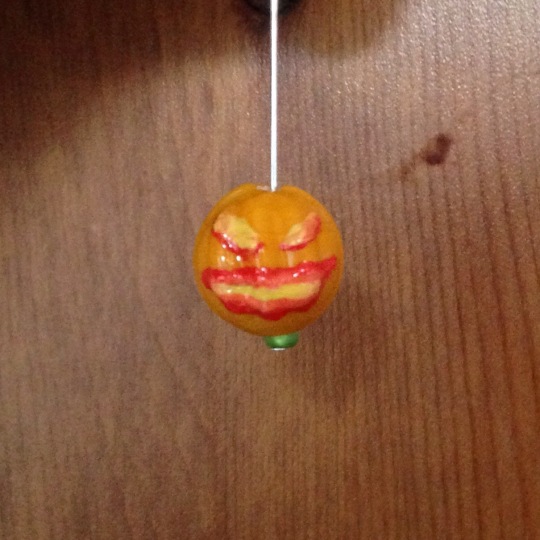
Next, outline with black to neaten the design. I used a striping brush, which was extremely fiddly. A marker would be much easier I think.
Thread a seed bead, and then the pumpkin bead onto the headpin. Thread on two more seed beads, then make a loop above them.

Put your pumpkins together
Attach the complete pumpkin to the end of one length of chain.
Put each leaf bead onto a jump ring. I actually made my jump rings from cut-off lengths of the headpin as I couldn’t find any.

Attach the leaf jump rings to the chain, wherever looks good to you.
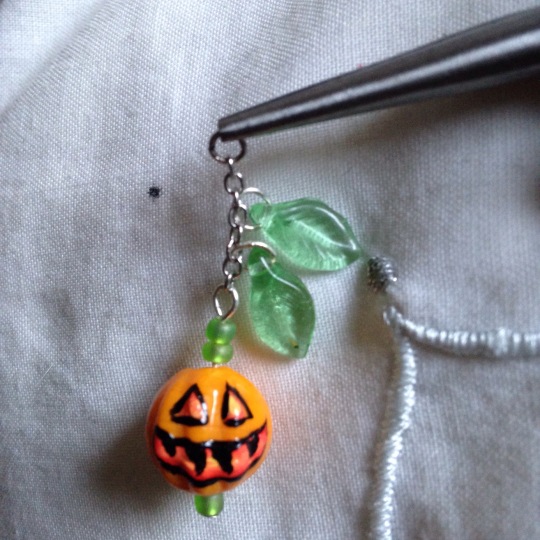
Finish up by attaching the ear wire to the other end of the chain.
My natural cynicism makes me unreasonably grumpy about most holidays, but I do quite like Halloween. In particular, I like to dress up and have a reason to eat and drink to excess.
I also relish any excuse to try out a new craft, so I was very excited to try out a friend’s rather snazzy pumpkin carving tools. I started out by looking for inspiration on Google images and settled on Boo from Mario as my design. I started out by sketching it onto the pumpkin using dry wipe marker.

This gave me an outline to trace using a Stanley knife. Next was the fun part, using a tool I called ‘the gouger’ to dig out the sections where I wanted light to come through. You have to be careful if you have a complex design because it’s very easy to accidentally remove bits you’re not intending. Technical language: you have to be aware of the positive and negative space (this is also important in papercraft).

It helps to stick a tea light in periodically to check the design is showing up like you want. You need to scrape away a fair bit of pumpkin flesh to achieve a good effect.


